Installing boot9strap (2xrsa)
Leitura Obrigatória
To extract the .7z files linked on this page, you will need a file archiver like 7-Zip or The Unarchiver.
What You Need
- The latest release of SafeB9SInstaller
- The latest release of boot9strap (standard boot9strap; not the
devkitfile, not thentrfile) - The latest release of Luma3DS (the
.7zfile) - The latest release of the Homebrew Launcher
Instructions
Section I - Prep Work
- Desligue seu dispositivo
- Insira o cartão SD no seu computador
- Copie o
boot.firmdo.7zdo Luma3DS para a raíz do seu cartão SD - Copy
boot.3dsxto the root of your SD card - Crie uma pasta chamada
boot9strapna raiz do seu cartão SD - Copie os arquivos
boot9strap.firmeboot9strap.firm.shado.zipdo boot9strap para a pasta/boot9strap/no seu cartão SD -
Copy
arm9.binandarm11.binfrom the SafeB9SInstaller.zipto the root of your SD card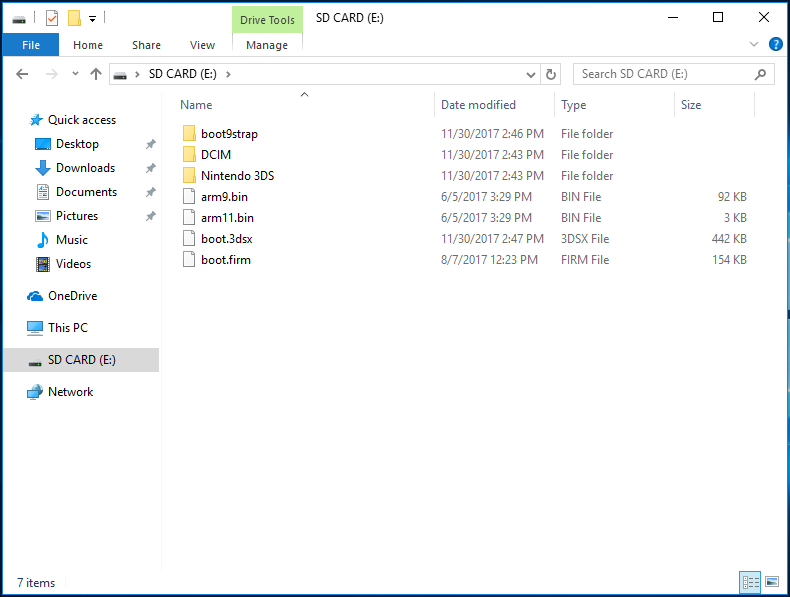
- Reinsira seu cartão SD no seu dispositivo
- Ligue o seu dispositivo
Section II - Launching SafeB9SInstaller
- Launch the browser and go to the following URL on your device
http://2xrsa.hacks.guide- If you are on a New 3DS, New 2DS, or Old 2DS and Wireless Communication is off, you can re-enable the wireless by removing the battery and unplugging the charger for several seconds then booting back up
- If you get the error “This service is not available in your region”, use the System Settings to set your device’s country to match the NAND region you installed with 2.1.0 CTRTransfer
- If you forgot to disable parental controls before CTRTransfering or otherwise cannot access wireless settings, note that the device will autoconnect to any network named
attwifiwith no password - If you get another error, follow this troubleshooting guide
- Se o exploit tiver sucesso, você terá entrado no SafeB9SInstaller
Section III - Installing boot9strap
- Espere todos as verificações de segurança finalizarem
- Quando solicitado, aperte a sequência de botões solicitada para instalar o boot9strap
- Quando concluído, aperte (A) para reiniciar o seu dispositivo
Section IV - Configuring Luma3DS
- Seu dispositivo deve ter reiniciado no menu de configuração de Luma3DS
- If you get a black screen, follow this troubleshooting guide
- Use o botão (A) e os botões direcionais para ativar o seguinte:
- “Show NAND or user string in System Settings”
- Aperte (Start) para salvar e reiniciar
- Se você receber um erro, apenas continue a próxima página